简单的 Egg 应用
在本章中我们先来学习如何写一个简单的 Egg 应用,通过它来了解一些基本的概念和术语。
友情提示
需注意的是,本文介绍的是 Egg 的基础使用。
对于 Egg 的开发者而言,很多插件无需自行安装,已经内置到框架,直接开启即可。
更多内容,在开发指南中可以了解到。
典型场景
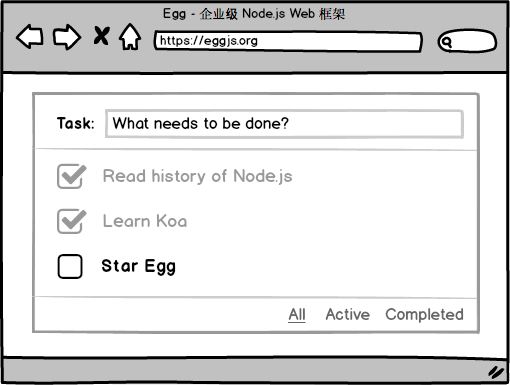
我们以 TodoMVC 这个典型的前端应用场景为例,一步步从零开始搭建。
完整的源码参见 eggjs/examples/todomvc。
逐步搭建
环境准备
初始化项目
通过骨架来初始化:
# 使用 `Egg` 的 `simple` 骨架来初始化
$ mkdir demo && cd demo
$ npm init egg --type=simple
$ npm install
目录结构
框架奉行『约定优于配置』,所以我们首先来看看生成的目录结构,更多可以参见目录规范。
demo
├── app
│   ├── controller # 控制器
│   │   └── home.js
│   └── router.js  # 路由映射
├── config # 配置文件
│   ├── config.default.js
│   └── plugin.js
├── test # 单元测试
├── README.md
└── package.json
Controller
Controller 负责解析用户的输入,处理后返回相应的结果。
// app/controller/home.js
const { Controller } = require('egg');

class HomeController extends Controller {
  async index() {
    const { ctx } = this;
    ctx.body = 'hi, egg';
  }
}

module.exports = HomeController;
接着配置 路由 映射到对应的 URL 上。
// app/router.js
/**
 * @param {Egg.Application} app - egg application
 */
module.exports = app => {
  const { router, controller } = app;
  router.get('/', controller.home.index);
};
本地开发
框架提供了本地开发的辅助工具。
- 辅助本地启动应用,监控代码变更自动重启。
- 自动生成
d.ts文件,提供智能提示和代码跳转等能力。
通过命令启动应用:
$ npm run dev
然后就可以访问 http://127.0.0.1:7001。
模板渲染
绝大多数情况,我们都需要读取数据后渲染模板,然后呈现给用户。
但 Egg 并不强制你使用某种模板引擎,故我们需要引入对应的『插件』。
术语讲堂
插件机制是我们框架的一大特色。它不但可以保证框架核心的足够精简、稳定、高效,还可以促进业务逻辑的复用,生态圈的形成。 详见开发指南 - 插件文档。
在本章中,我们使用 Nunjucks 来渲染,先安装对应的插件 egg-view-nunjucks :
$ npm i egg-view-nunjucks --save
开启插件:
// config/plugin.js
exports.nunjucks = {
  enable: true,
  package: 'egg-view-nunjucks'
};
按照约定,在 app/view 目录下添加对应的模板文件:
<!-- app/view/home.tpl -->
<html>
  ...
  <script src="/public/main.js"></script>
</html>
对应的 Controller 改为:
class HomeController extends Controller {
  async index() {
    const { ctx } = this;
    // 渲染模板 `app/view/home.tpl`
    await ctx.render('home.tpl');
  }
}
静态资源
前端代码的发布,一般有:
- 构建后发布到
CDN。(推荐) - 直接在应用中托管。
Egg 内置了 egg-static 插件,对后者提供了支持。
默认会把 app/public 目录映射到 /public 路由上。
在本例中,我们使用 Vue 来写对应的前端逻辑,可以直接参见示例代码。
注意事项
static插件,线上会默认设置一年的magAge。- 框架默认开启了 CSRF 防护,故
AJAX请求需要带上对应的token:
// app/public/main.js
axios.defaults.headers.common['x-csrf-token'] = Cookies.get('csrfToken');
配置文件
写业务的时候,不可避免的需要有配置文件。
框架提供了强大的配置合并管理功能。
如上述的 nunjucks 插件,添加对应的配置:
// config/config.default.js
config.view = {
  defaultViewEngine: 'nunjucks',
  mapping: {
    '.tpl': 'nunjucks',
    '.html': 'nunjucks',
  },
};
注意事项
是 config 目录,不是 app/config!
Service
我们的业务逻辑一般会写在 Service 里,然后供 Controller 调用。
// app/service/todo.js
const { Service } = require('egg');

class TodoService extends Service {
  /**
   * create todo
   * @param {Todo} todo - todo info without `id`, but `title` required
   */
  async create(todo) {
    // validate
    if (!todo.title) this.ctx.throw(422, 'task title required');

    // normalize
    todo.id = Date.now().toString();
    todo.completed = false;

    this.store.push(todo);
    return todo;
  }
}
对应的 Controller 如下:
// app/controller/todo.js
class TodoController extends Controller {
  async create() {
    const { ctx, service } = this;

    // params validate, need `egg-validate` plugin
    // ctx.validate({ title: { type: 'string' } });

    ctx.status = 201;
    ctx.body = await service.todo.create(ctx.request.body);
  }
}
RESTful
Egg 对 RESTful 这种常见的场景提供了内建的支持:
// app/router.js
module.exports = app => {
  const { router, controller } = app;

  // RESTful 映射
  router.resources('/api/todo', controller.todo);
};
对应的 Controller:
// app/controller/todo.js
class TodoController extends Controller {
  // `GET /api/todo`
  async index() {}

  // `POST /api/todo`
  async create() {}

  // `PUT /api/todo`
  async update() {}

  // `DELETE /api/todo`
  async destroy() {}
}
单元测试
Web 应用中的单元测试非常重要,框架也提供了对应的单元测试能力支持。
// test/app/controller/todo.test.js
const { app, mock, assert } = require('egg-mock/bootstrap');

describe('test/app/controller/todo.test.js', () => {
  it('should add todo', () => {
    return app.httpRequest()
      .post('/api/todo')
      .send({ title: 'Add one' })
      .expect('Content-Type', /json/)
      .expect('X-Response-Time', /\d+ms/)
      .expect(201)
      .expect(res => {
        assert(res.body.id);
        assert(res.body.title === 'Add one');
        assert(res.body.completed === false);
      });
  });
});